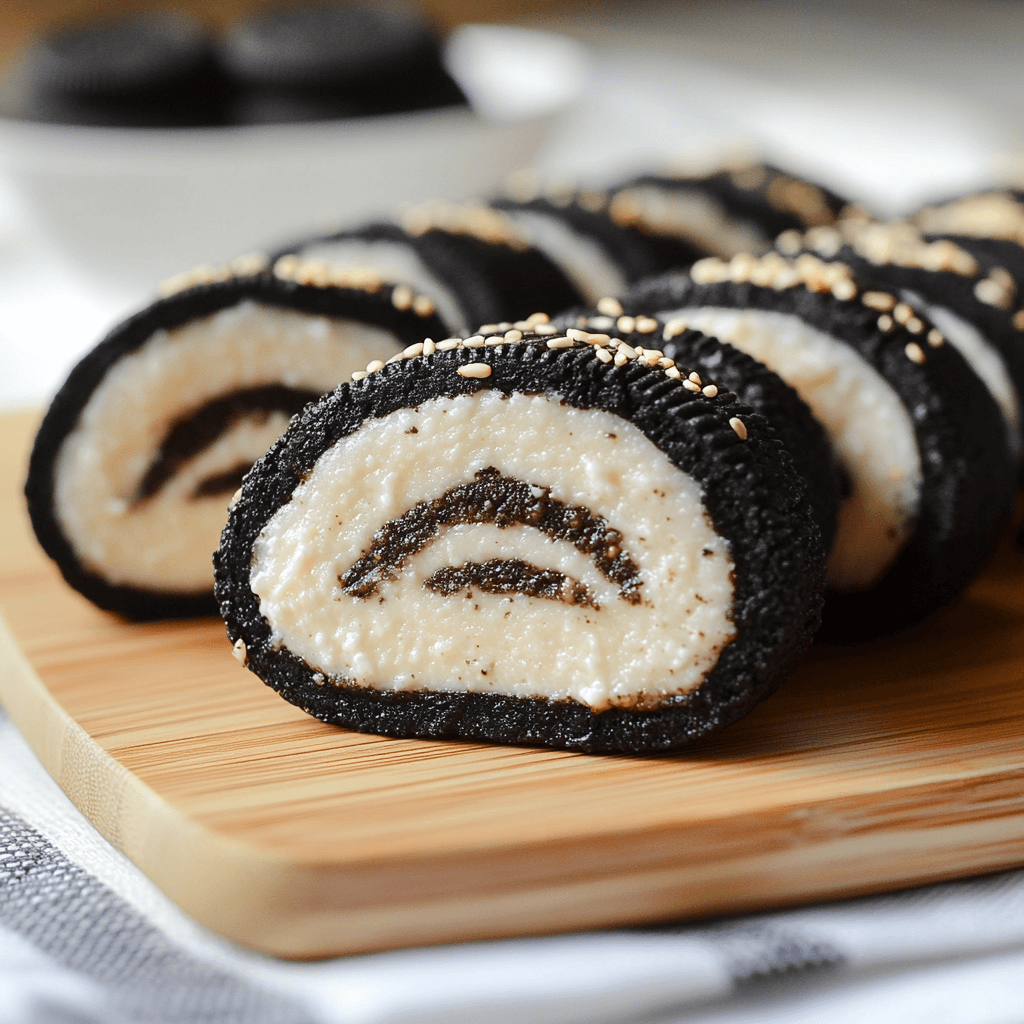
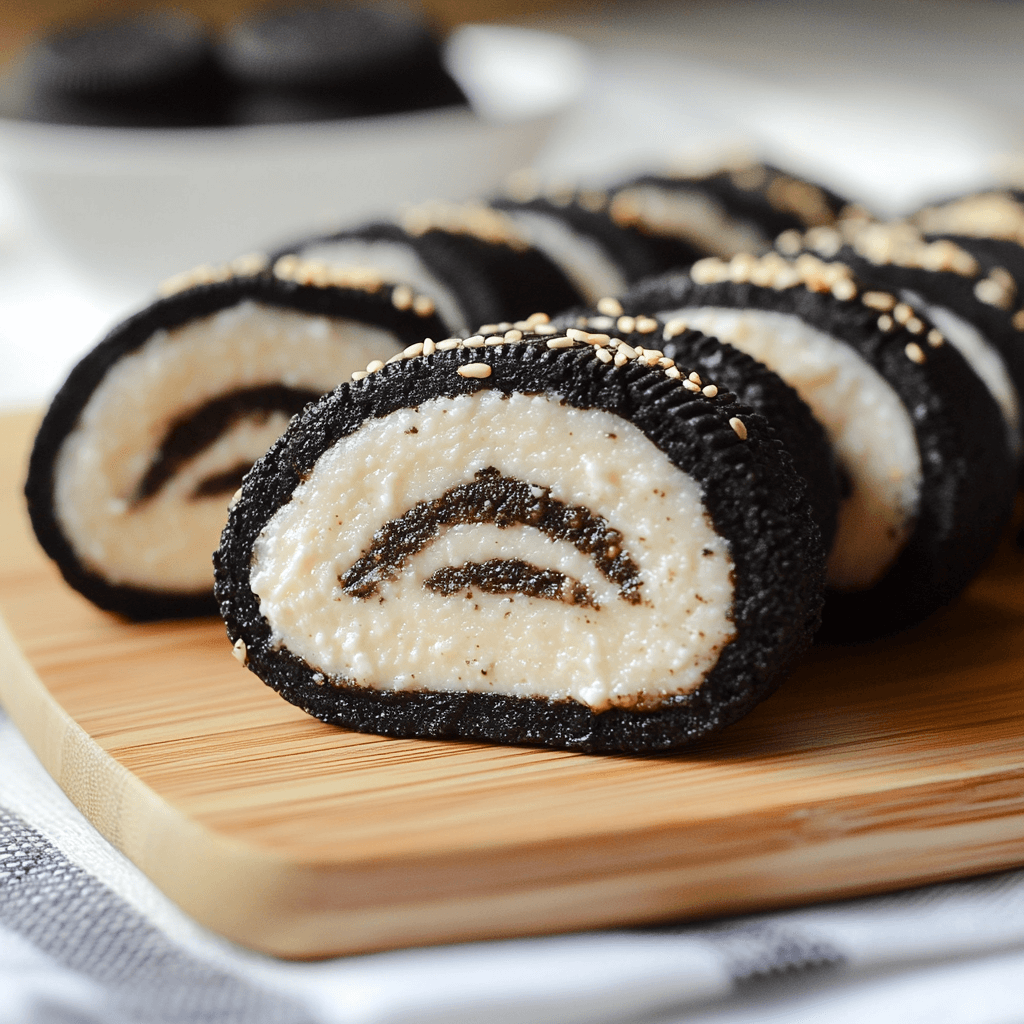
Oreos and sushi—two beloved treats rolled together in a no-bake marvel that’s taken social media by storm. Enter Oreo Sushi: a simple, yet genius twist on the classic cookie. It’s gone viral on TikTok, and I can see why. The sheer fun of smooshing, rolling, and slicing Oreos into these bite-sized delights is just too tempting to resist.
I remember the first time I tackled these little sushi rolls in my own kitchen. My kids were more amused by the notion of turning cookies into sushi than they were by the eating part, but I couldn’t resist the playful creativity of it all.
To craft your own Oreo Sushi, you’ll only need Oreos and milk—though I suggest using your favorite type here, be it cow’s, almond, or soy. Start by twisting apart the Oreos and setting that cream aside (don’t fret, it won’t go to waste). Blitz the cookie shells into fine crumbs using a food processor or the old-fashioned way with a rolling pin and a bag—as I did when trying to avoid cleaning another appliance. Add a splash of milk to these crumbs, just enough to bring them together into a dough-like consistency.
Flatten this dough out between two sheets of plastic wrap into a neat rectangle. The cream you saved earlier gets a tiny splash of milk to become a dreamy spread—it’s like a bonus of sweet frosting, only better because it’s homemade… sort of.
Roll everything up as tightly as you can, then pop those rolls into the fridge to firm up. If you’ve got little ones like I do, distractions during this chilling period can range from a game of tag to a quick episode of Bluey. When the wait is over, slice these cooled rolls into rounds that scream “I’m a fancy dessert.”
It’s no secret I have a soft spot for Oreos, and experimenting with their traditional form is half the fun. Whether you’re after snack-time novelty or just a playful dessert, Oreo Sushi is a no-bake revelation. Give it a try, and I dare you not to fall in love with the simple joy of it.

Why No-Bake?
No-bake recipes like Oreo Sushi are such a game-changer. For those who find baking a bit tricky, a no-bake creation can be a real lifesaver. We’re skipping the stress of preheating ovens and monitoring baking times, and jumping straight to the fun part—assembling and savoring.
With Oreo Sushi, you’re bypassing the fuss and ensuring a quick turnaround from pantry to plate. This suits families where, trust me, time is as precious as the last cookie in the jar. It’s incredibly satisfying that even the littlest hands can get involved without worrying about hot trays or precise measurements.
Convenience aside, let’s not forget about creating something that can cater to your dietary needs. Swapping out whole-fat dairy for almond milk or a sugar substitute can keep things lighter and more suitable for your health journey, should you be on one.
No-bake options like this also save us in the event of surprise playdates or unexpected guests. You’re always just a few ingredients away from preparing a decent dessert, and Oreos tend to be a permanent fixture in many households as it is. It’s quick, it’s effortless, and importantly, it’s delicious. There’s beauty in simplicity, and this recipe captures just that.
Ingredients & Tools Needed
To whip up Oreo Sushi at home, you’ll need:
Ingredients:
- Oreos (any variant you fancy)
- Your preferred milk (dairy, almond, soy, or oat)
Optional add-ins:
- Vanilla extract
- Coconut cream
- Flaky salt
Tools:
- Food processor or rolling pin and plastic bag
- Plastic wrap
- Butter knife or offset spatula
- Sharp knife or unflavored dental floss for slicing
With this short list of ingredients and adaptable tools, Oreo Sushi is a fun, accessible dessert that requires very little effort for a big payoff. Enjoy experimenting with what suits your taste and resources best!
Preparation Tips from My Kitchen
Here are a few handy tips from my kitchen to make your Oreo Sushi experience smooth and enjoyable:
- Separating Oreos: Use a butter knife to ease the cream off without breaking the cookie. Don’t worry about crumbs in your cream—they’ll blend right in later.
- Getting the dough right: Add small amounts of milk and combine thoroughly until you have a texture that resembles wet sand, easy to mold yet firm enough to roll.
- Rolling the dough: Use gentle, even movements with your rolling pin between two sheets of plastic wrap. Aim for consistent thickness to make rolling the sushi easier.
- Chilling: At least an hour in the fridge will do, but overnight results in even better texture and flavor.
- Slicing: Use a sharp knife or dental floss for clean edges.
- Storage: Place sushi slices in an airtight container in the fridge. They last a few days, giving you ample time to snack on this curious treat.
These practical tips should help you achieve a seamless Oreo Sushi making experience, right in your own home!
Versatility in Customisation
Oreo Sushi is your playground for endless customization. Let’s mix things up a bit:
- Flavors: Try different Oreo varieties, from birthday cake to mint. Let your taste buds lead the way.
- Add-ins: Incorporate crushed nuts or a sprinkle of your favorite spice into the dough for extra oomph.
- Fillings: Spread rich chocolate, smooth peanut butter, or fruity jam over the Oreo base for an indulgent twist.
- Toppings: Decorate with sprinkles, coconut, or drizzles of melted chocolate for vibrant looks and added texture.
- Dietary adjustments: Use plant-based milk for vegan options, or seek out gluten-free alternatives if needed.
The beauty of Oreo Sushi is its adaptability. Whether you’re experimenting with flavors, adjusting for dietary needs, or taking your decorative flair up a notch, this recipe is your canvas. Enjoy the creative process, and share the simple fun of Oreo Sushi at your next family gathering or casual catch-up with friends.
Oreo Sushi Recipe
Ingredients:
- 24 Oreo cookies
- 1/4 cup milk (any type)
Instructions:
- Separate the Oreos:
Twist each Oreo apart and scrape the cream into a small bowl. Keep the cookies and cream separate. - Crush the Cookies:
Blend cookies into fine crumbs using a food processor or crush in a ziplock bag with a rolling pin. - Make the Dough:
Mix crumbs with milk gradually until it forms a pliable, not sticky dough. - Prepare the Cream Filling:
Mix reserved Oreo cream with a splash of milk until smooth and spreadable. - Roll out the Dough:
Flatten dough between plastic wrap into a 1/4 inch thick rectangle. - Spread the Cream:
Evenly spread the creamy mixture over the flattened dough. - Roll the Sushi:
Use plastic wrap to guide the dough into a tight roll. - Chill the Roll:
Wrap tightly and refrigerate for at least 1 hour (overnight for better texture). - Slice the Sushi:
Use a sharp knife to slice the roll into about 12 pieces.
Enjoy your Oreo Sushi right away or store it in an airtight container in the fridge for a few days. Happy snacking!
Nutritional information (per serving, assuming 12 servings):
- Calories: 130 kcal
- Carbohydrates: 20g
- Protein: 1g
- Fat: 5g
- Sugar: 13g
- Sodium: 115mg


